A Step-by-Step Guide to Ventilation Testing and Commissioning
Ventilation systems are essential for maintaining healthy indoor air quality, managing thermal comfort, and ensuring compliance with building regulations. Whether you are a facilities manager, engineer, contractor, or building owner, understanding how ventilation systems are tested and commissioned is key to unlocking optimal performance and long-term reliability.
This guide breaks down the process into clear, practical steps. Along the way, it shows why structured testing and commissioning matters, what tools and standards are involved, and how you can ensure your ventilation system delivers on its design intent.
Why Ventilation Testing and Commissioning Matters
Before we explore the steps, it helps to understand why testing and commissioning are critical.
A new or upgraded ventilation system may have been designed perfectly on paper, but without proper verification it can:
- Deliver insufficient airflow
- Fail to manage contaminants effectively
- Consume excessive energy
- Produce noise, drafts, or imbalanced pressures
- Fall short of regulatory requirements
Testing and commissioning ensure that the system is installed correctly, functions according to design specifications, and supports occupant health, safety, and productivity.
For specialist support and professional compliance services, many organizations turn to trusted providers of LEV Testing tailored to industry standards and performance benchmarks.
Now let’s walk through the step-by-step process.
Step 1: Review the Design and Specifications
The first step in testing and commissioning begins before any measurement is taken. A thorough review of design documents, specifications, and standards creates the baseline against which performance will be judged.
Key items to check include:
- Ventilation design intent and target airflows
- Applicable codes, best practices, and compliance criteria
- Equipment data, fan curves, duct sizing, and control sequences
- Sensor locations and calibration requirements
This review ensures that the testing team understands what success looks like before testing begins.
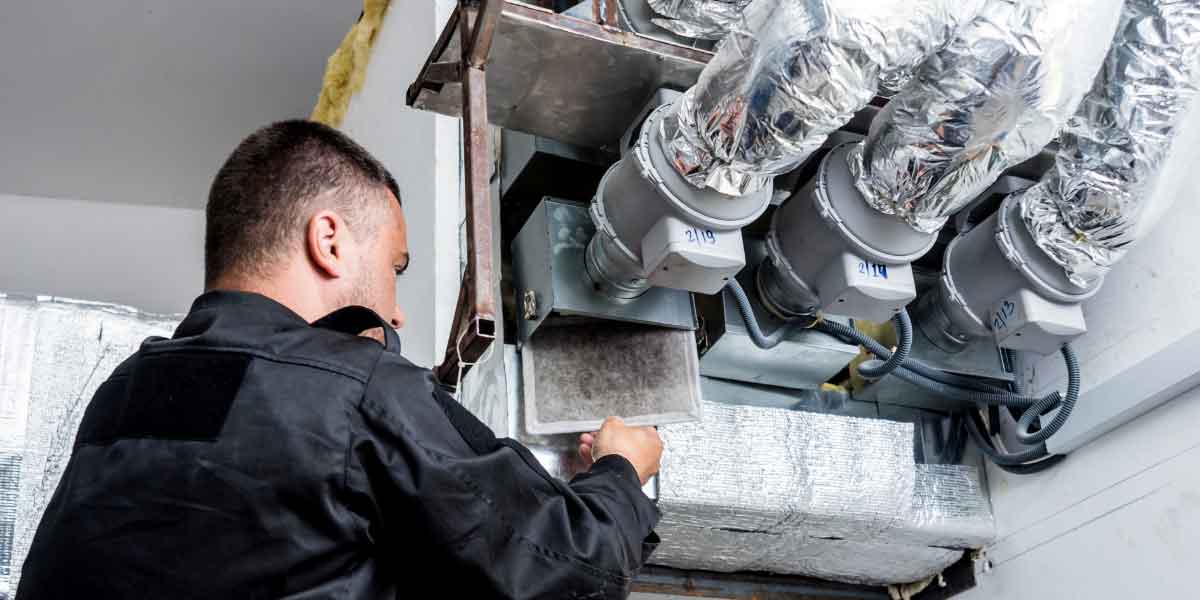
Step 2: Prepare the System for Testing
Before measurements can be collected, the ventilation system must be prepared. This means:
- Verifying that all equipment is installed and powered
- Ensuring ductwork and plenums are clean and free of debris
- Checking that access panels allow for sensor placement
- Confirming that controls are commissioned and responsive
Sometimes this step reveals installation issues that should be corrected before actual testing begins. Addressing these early prevents wasted time and inaccurate results.
Step 3: Conduct Baseline Airflow Measurements
Airflow is the core metric in ventilation performance. During this step, technicians measure air quantity at strategic points to confirm design intent. Tools commonly used include:
- Anemometers to measure air velocity
- Balometers to capture supply and return flow rates
- Duct traversing instruments for detailed profiles
- Pitot tubes for pressure and velocity readings
Baseline airflow measurements establish whether the system is moving the right volume of air to each zone. Any imbalances or deviations are documented for adjustment.
Step 4: Measure Pressures and Balances
Proper pressure relationships ensure that ventilation not only delivers air but does so without creating drafts, leakages, or infiltration issues.
During pressure testing, the team evaluates:
- Static pressures in ducts and plenums
- Differential pressures between rooms, corridors, and outside
- Fan inlet and outlet pressures compared with manufacturer specifications
These measurements confirm that the fans, dampers, and controls are interacting correctly and that spaces maintain intended pressure gradients.
Step 5: Evaluate Controls and System Responsiveness
Testing data alone is not enough. A fully commissioned system must respond correctly to control signals and environmental changes.
This part of the process verifies that:
- Variable air volume (VAV) systems modulate as intended
- Sensors report accurate temperature, humidity, and CO2 levels
- Controls tie into building management systems (BMS)
- Automated responses occur as designed during mode changes
An intelligently controlled system adapts airflow based on occupancy, time schedules, external conditions, and indoor air quality metrics.
Step 6: Assess Noise and Comfort Levels
Ventilation performance is not purely technical. Occupant comfort matters too.
Testing teams will:
- Measure sound levels near diffusers and grilles
- Observe draughts and thermal comfort issues
- Solicit occupant feedback when possible
Excessive noise, unpleasant drafts, or hot and cold spots can be signs of improper balancing or diffuser placement.
Step 7: Compile a Commissioning Report and Rectify Issues
Once all tests are complete, the commissioning team compiles a detailed report that includes:
- Measured values compared against design targets
- Pass/fail criteria for each test
- Photos, graphs, and instrument output where applicable
- A list of deficiencies and recommended corrective actions
The system owner or facilities team then reviews the findings and implements any required adjustments. A follow-up check may be scheduled to confirm that fixes were successful.
Step 8: Establish a Maintenance and Re-Testing Plan
Ventilation commissioning is not a one-time event. To maintain performance over the life of the system, a maintenance plan is essential.
This should include:
- Scheduled filter replacements
- Regular calibration of sensors
- Periodic testing of key airflow and pressure points
- Controls testing after software or hardware updates
Re-testing at defined intervals ensures that the system continues to deliver healthy, efficient performance as conditions change.
Summing Up
Testing and commissioning are fundamental to delivering ventilation systems that work as intended. From initial design reviews to airflow measurement, pressure balancing, control validation, and ongoing maintenance planning, each step confirms that your system supports health, comfort, and efficiency.
With expert support such as professional LEV Testing, organizations can achieve compliance, validate performance, and instill confidence that their indoor environments are safe and resilient.
By following this step-by-step guide, you can ensure that your ventilation system is more than installed. Rather, it is proven to perform.